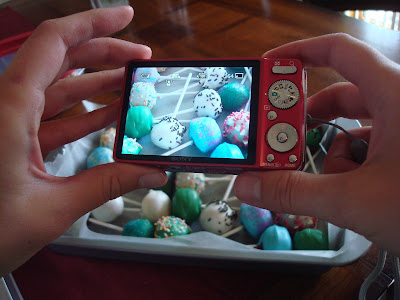
This past weekend I got to catch up with two friends, Terri and Marie. We've known each other for a long time - we went to the same church, middle school, high school, and college. Terri has since moved (too) far away and gotten married. Marie and I decided to make the trek to Wisconsin to see her together. Marie and I go WAY back... we grew up next door to each other since we were 5 years old. We were also roommates all four years of college.
It was so great getting to catch up with these two - we don’t see each other often enough. One of the things we planned to do over the weekend was make cake pops! Marie was the most experienced cake pop maker of us all, she’d done it several times. I’d only done it once, and it was Terri’s first time.
 |
| Marie, the cake pop pro of our group |
We decided to make a double batch and made the cakes in advance. I brought a cooked, cooled, and crumbled red velvet cake and Terri had made a yellow cake. We decided to use a canned cream cheese frosting for the red velvet cake and chocolate frosting for the yellow cake.
We didn't do anything too fancy with the decorations, just picked some candy melt colors and used whatever sprinkles we had on hand.
I have to admit. Cake pops were frustrating the first time I tried them. This second time went MUCH more smoothly... Here’s a couple things I learned:
1) Don’t make extra work for yourself – go with boxed cake and canned frosting.
The first time I made cake pops, I used boxed mix but made homemade frosting. I did this mostly because I’d read in a lot of reviews that the cake pops are almost too sweet with canned frosting. Well, I’ve had both now and I disagree. I do have a sweet too, but I really don’t think they are too sweet.
Cake pops are enough work as it is, you don’t need to add making a homemade frosting to the process. The difference in taste just isn’t drastic enough to justify it, in my opinion.
2) Use a spoon to assist with coating
Marie had a great tip for us - use a spoon to help coat the pop and get the excess off. I thought this was really helpful. Work with a cake pop in your right hand and a spoon in your left (if you're right-handed). Dip the pop in the candy melts and get a spoonfull of candy coating. Use the spoon to add candy coating to any missed areas. Then (without any pressure) rest the cake pop in the spoon and gently spin. Sorry I don't have photos of this, I didn't think of it at the time. I'll get some next time.
3) Grab a friend!
Make cake pops with friends whenever possible! This is by far the most helpful tip. The first time I made cake pops it took me several evenings to get through the entire batch. Granted, I did two different kinds. But still, it was frustratingly slow. I figured we'd be making cake pops all of Saturday this time around. But we completed two entire batches in only 90 minutes!
Teamwork is your best bet when it comes to cake pops!!
 |
| Terri, me, and Marie |
I'd definitely claim this cake pop adventure a success! In fact, it was such a breeze, I'm already itching to make them again :-) Thanks for a fun weekend, girls!
Oh, and I had to make a special cake pop to bring home for my hubby...
And, in case you were wondering, cake pops make a good treat on a long car ride :-D
Have you tried cake pops? What's your favorite tip or trick you use to make it easier?


I love the last picture! Very cool! Thanks for coming to visit. Come again soon!
ReplyDeleteMmmmm... do you need a taste tester? :-)
ReplyDelete